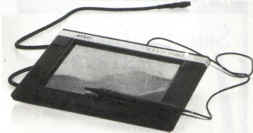
One of the nice things about Atari
Artist used with the touch tablet is that it saves pictures in a
'compacted' form which enables many more pictures to be stored on
disk or cassette. One of the problems is that this format is not
compatible with any of the available programs for loading pictures
into your own programs. Up to now this has meant that your picture
has had to be saved in 'Micropainter' format by using the INSERT
key whilst in DRAW mode and every picture no matter whether simple
or complex would take 62 sectors on a disk. I wanted to write a
game which required many pictures and so had to find a way to use
the 'compacted' format. Here then you have the inside story about
Atari Artist's compaction technique together with a program (which
runs in machine code) to load pictures into your own programs. Later
I will provide a routine to use with this program which will allow
you to add more colours to your picture.
The first point to note about
the compaction technique is that there are two different modes of
screen access, vertical and horizontal.
Vertical access: If we
consider the screen as being divided into 40 columns (or bytes)
then we access one column at a time, starting at the first row and
move down every other row until we reach the bottom of the screen.
We then return to the top of the column and begin with the second
row moving down every other row again until we reach the bottom
before moving to the next column.
Horizontal access: This
simply scans across rows from left to right.
So how do we know which format
to use? In every PIC file saved by Atari Artist the 8th byte in
the file indicates the mode (1 =vertical, 2=horizontal). From there
bytes 14 to 18 hold the values for the colour registers 708 to 712
before the actual screen data begins at byte 28. Note that, of the
first 27 bytes, only those described are actually used. The others
appear redundant other than a length count which it is not necessary
to use. The compacted screen data takes the following form:

OP can define three different operations:
OP=0:
The data field for this operation
is three bytes long and takes the form

hi and low form a 16 bit value
(256*hi+low).
The action to be taken here is
to store 'byte' in the next (256*hi+low) screen locations.
OP<=128 (but obviously > 0):
In this case the data field is
just one byte long

This is similar to OP=0 but is
effectively an 8 bit version as the action taken is to store 'byte'
in the next 'OP' screen locations.
OP>128:
In this case the data field is
OP-128 bytes long

Here the action taken is to store
the OP-128 bytes in the next OP-128 screen locations.
Note that in all three modes the
'next' byte is determined by whatever screen access mode we are
in.
The whole picture from byte 28
to the end of the file is then stored as a series of 'OP's and their
data fields. The OP used is dependant on the number of pixels of
the same colour (or bytes of the same value) in each row or column
of the screen.
The PICLOADA program can be used
in conjunction with your own BASIC programs (as a subroutine). The
original version was in BASIC but was somewhat slow so this is version
two which is in machine code to load a picture as fast as Atari
Artist. The program will prompt you for a filename (you must use
the device name) and will then set up an ANTIC #E display list before
loading in the picture. Once loaded you may press any key to load
another picture.
The main body of the machine code
is relocatable and is therefore stored in a BASIC string, although
a couple of routines have to be stored in page 6. In fact the main
code is 244 bytes long and the routines in page 6 occupies 158 bytes.
The routine can easily be called from BASIC by the following command:
<var> = USR( ADR(CODE$),ADR(FILENAME$)
)
where CODE$ contains the main body of
the machine code routine and FILENAME$ contains the filename of the
compacted picture. Lines 10 to 630 of the program set up the machine
code routine while the rest of the program demonstrates how the
routine should be used by loading in compacted screens specified by
the user.
top